I wanted to take a sec to share some recent Bolt Action activities that I’ve been involved in!
Rich at Chicago Terrain Factory and I ran our 2nd year of the Kursk battle at Adepticon. Check out his coverage of the event, it is excellent. We had a blast this year and I think the folks who played had a great time.
Soviet T34s burning all over the place.
We limited the game to tanks and had a good turn out for each side. Over 20 tanks lined up and going at it. The Germans really held out this time, burning T34s everywhere!
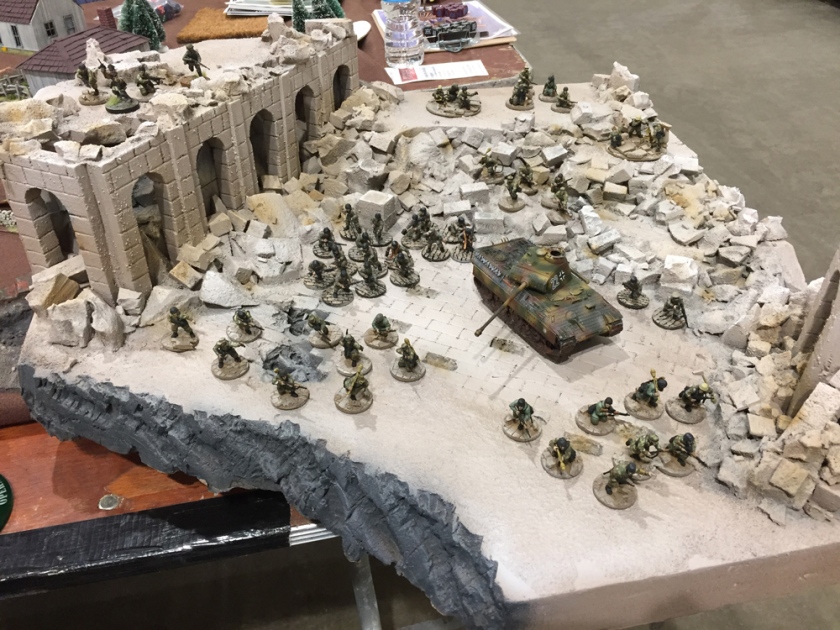
Cassino Display for 2017 Team Tournament Army.
The Fallschirmjager also made an appearance at Adepticon in the Team Tournament. We got stomped by our opponents but had a great time.
I am revising and doing some updates to the Fallschrimjager for Operation Sting 2017. I took them last year and had a good time running them. This year I am building the list around the paratroopers who fought the Canadian 3rd Division in the ruins of Ortona. The list will see a few changes including potentially adding a vehicle to the army, which wasn’t the case with the Monte Cassino version of the army.
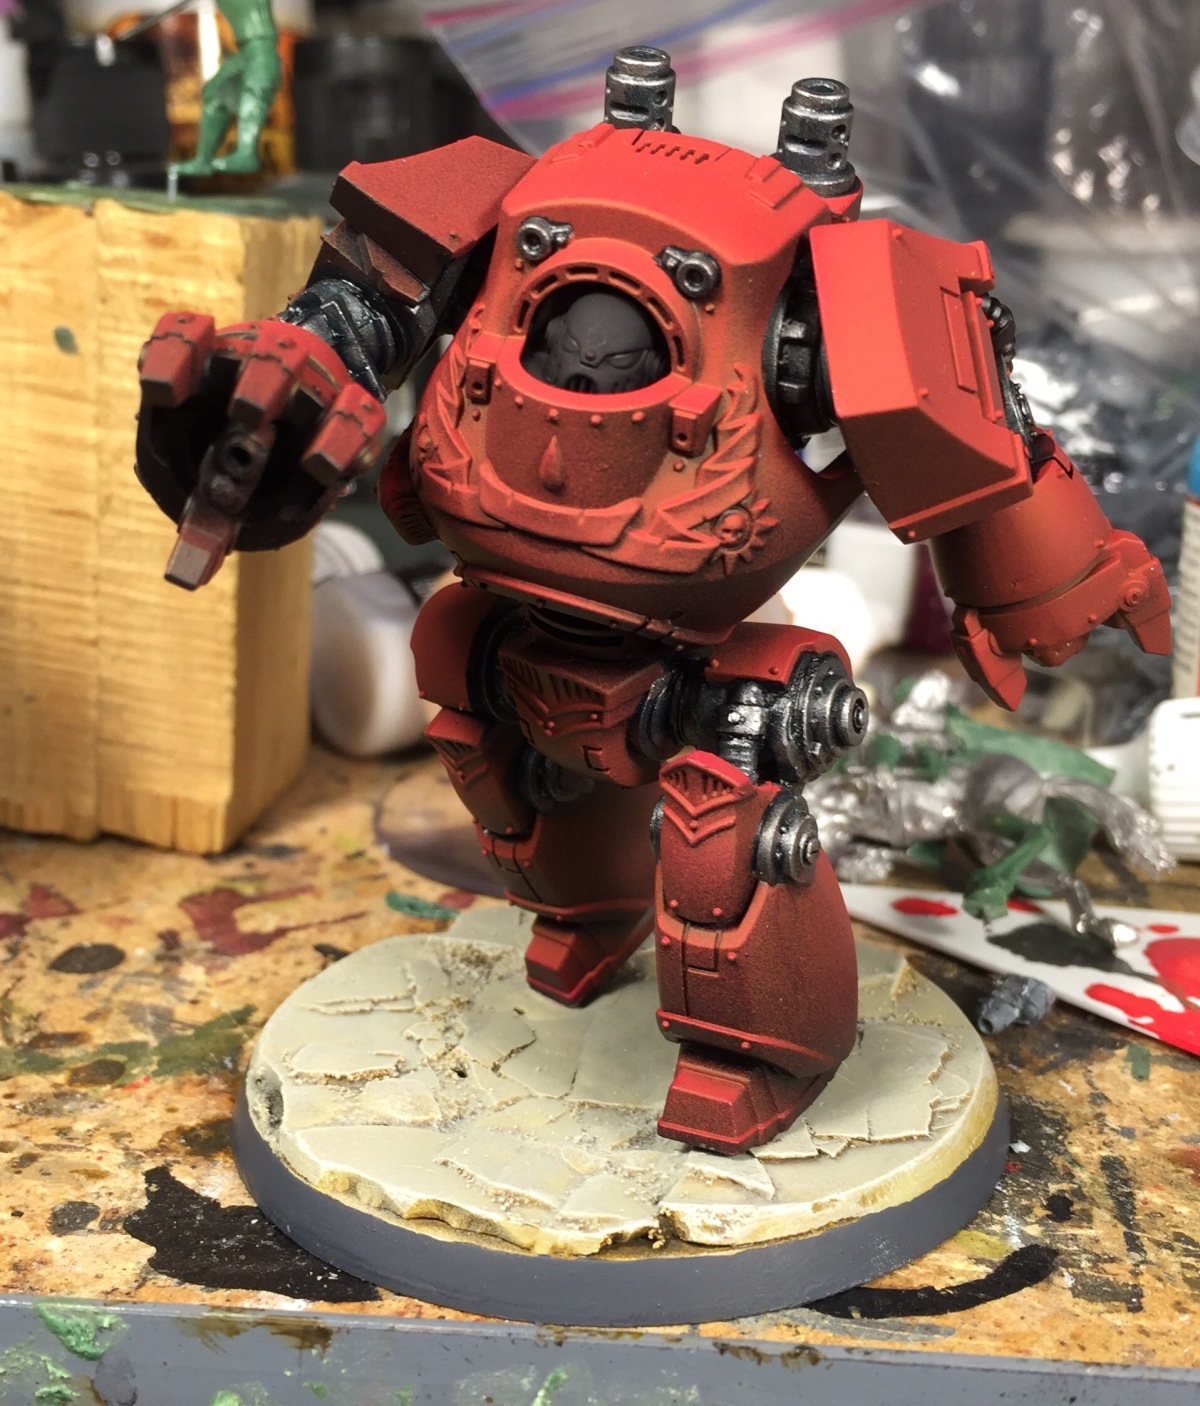
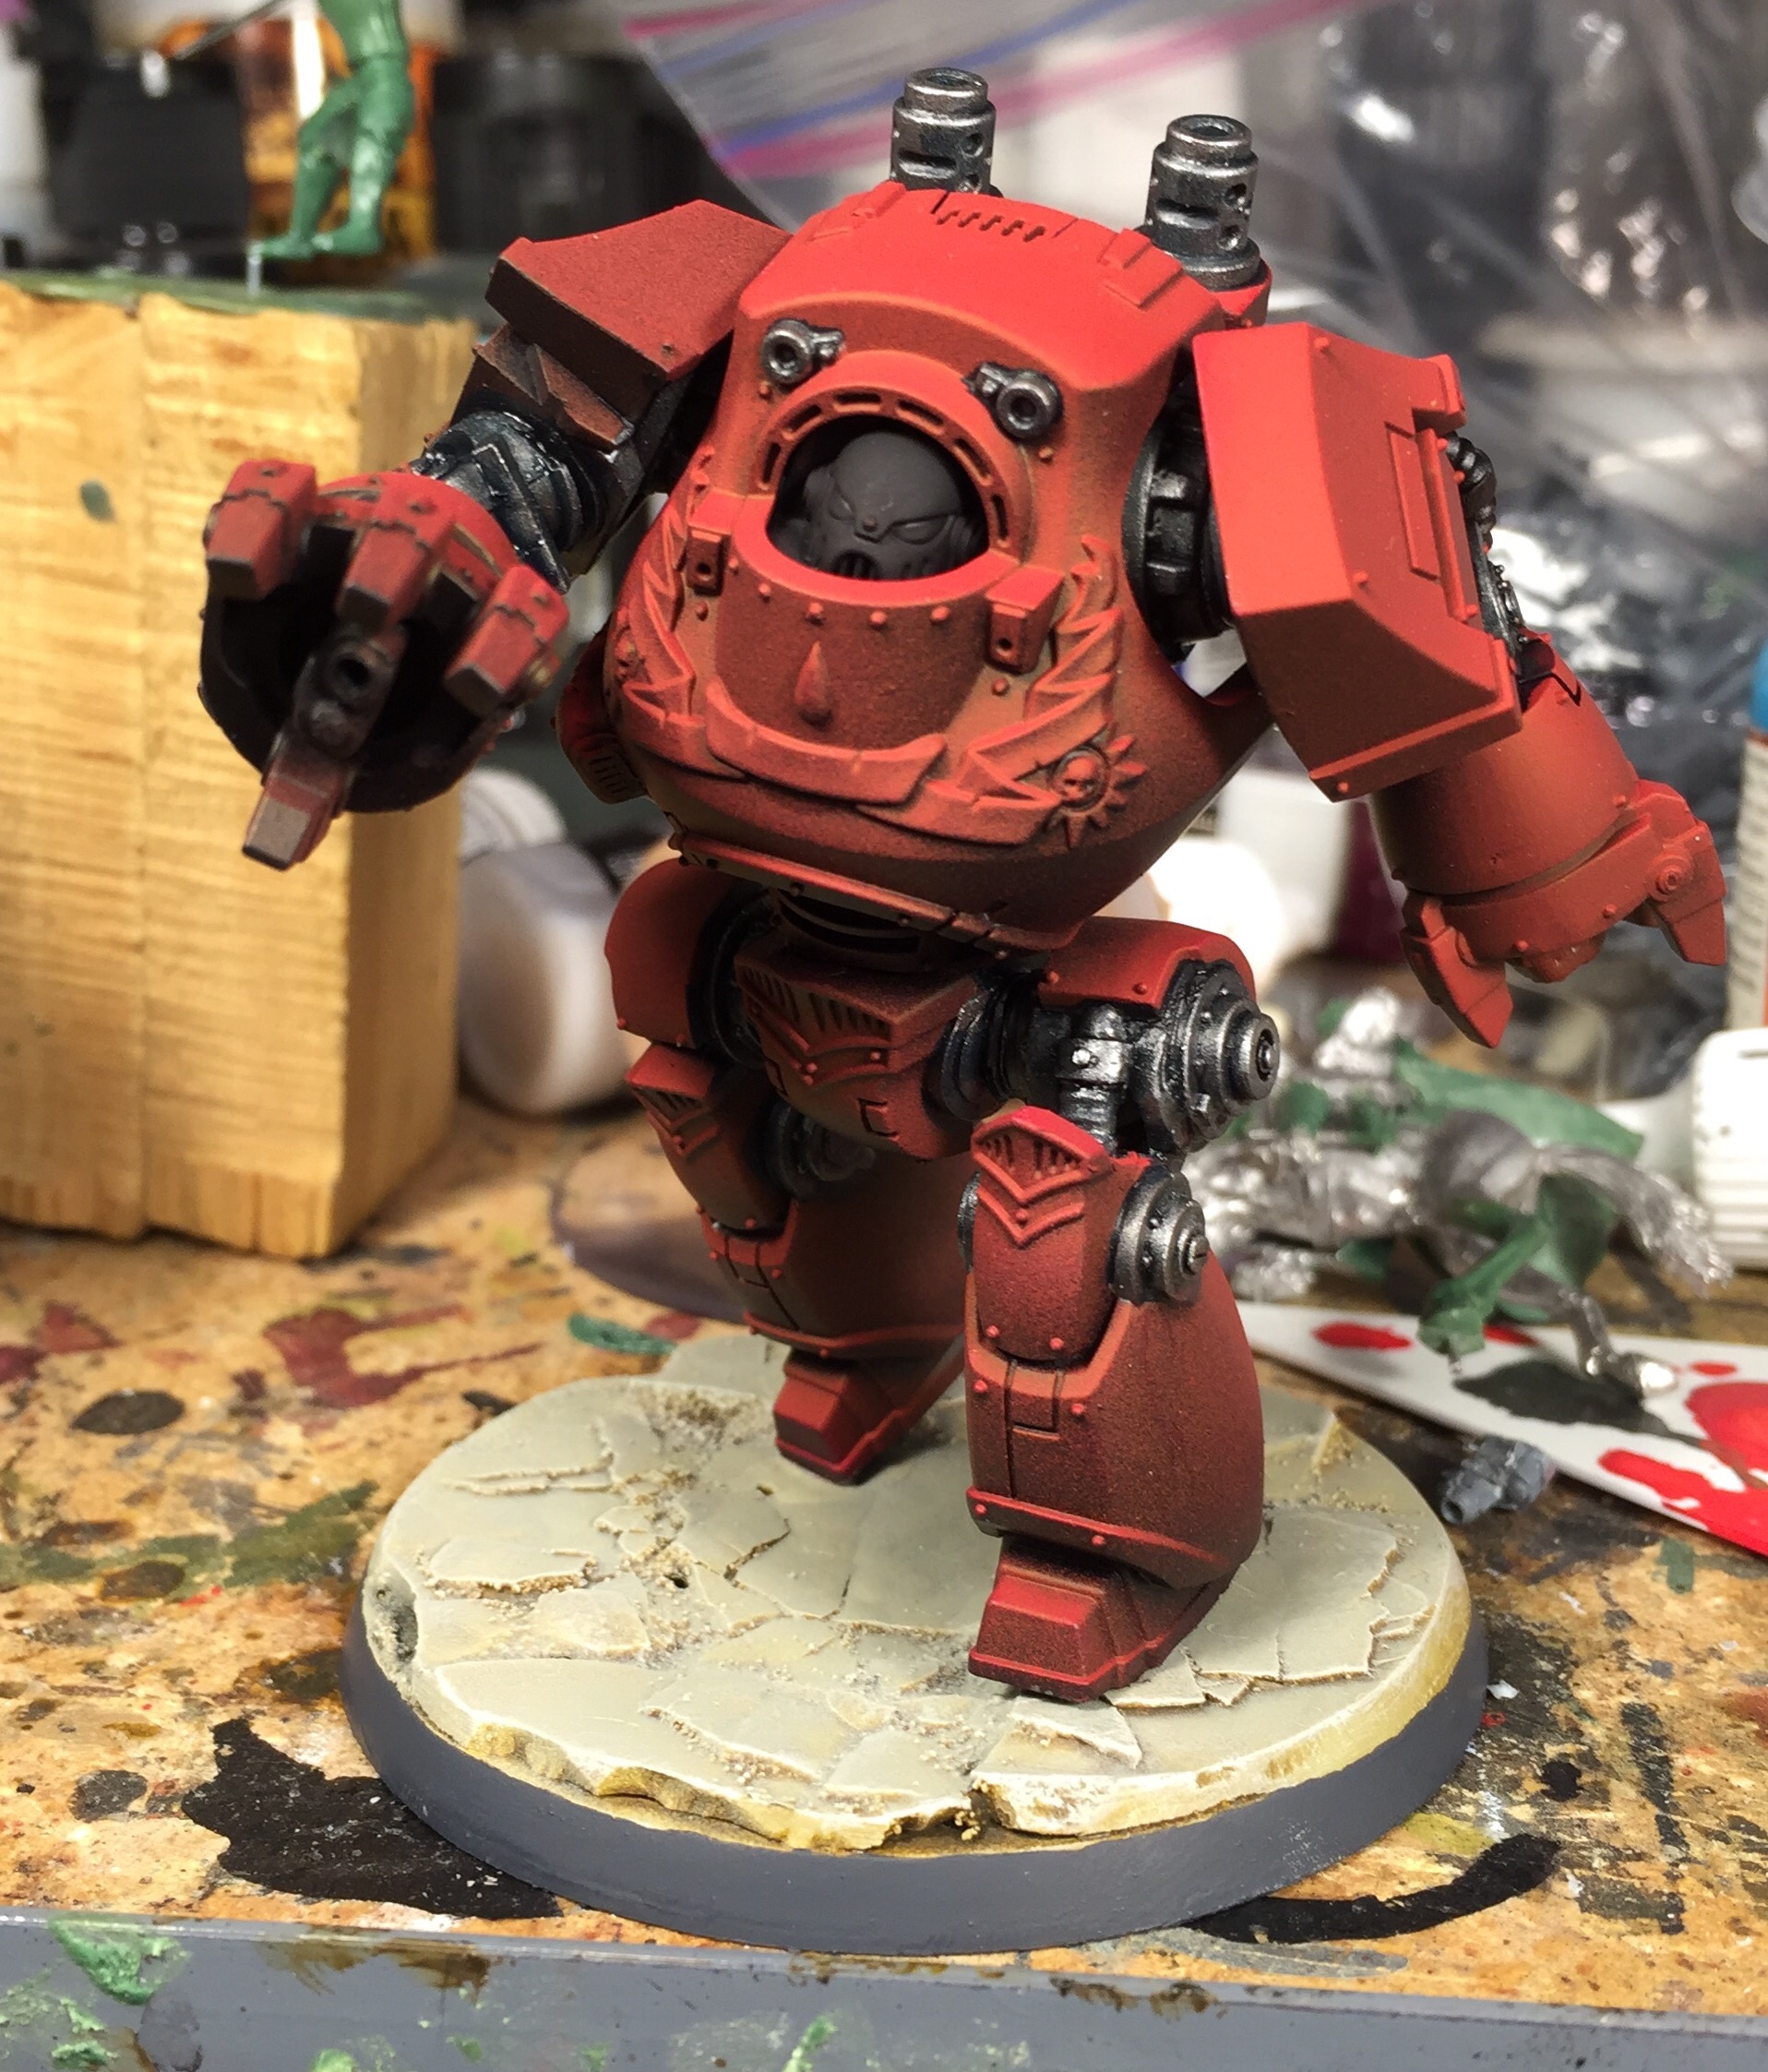
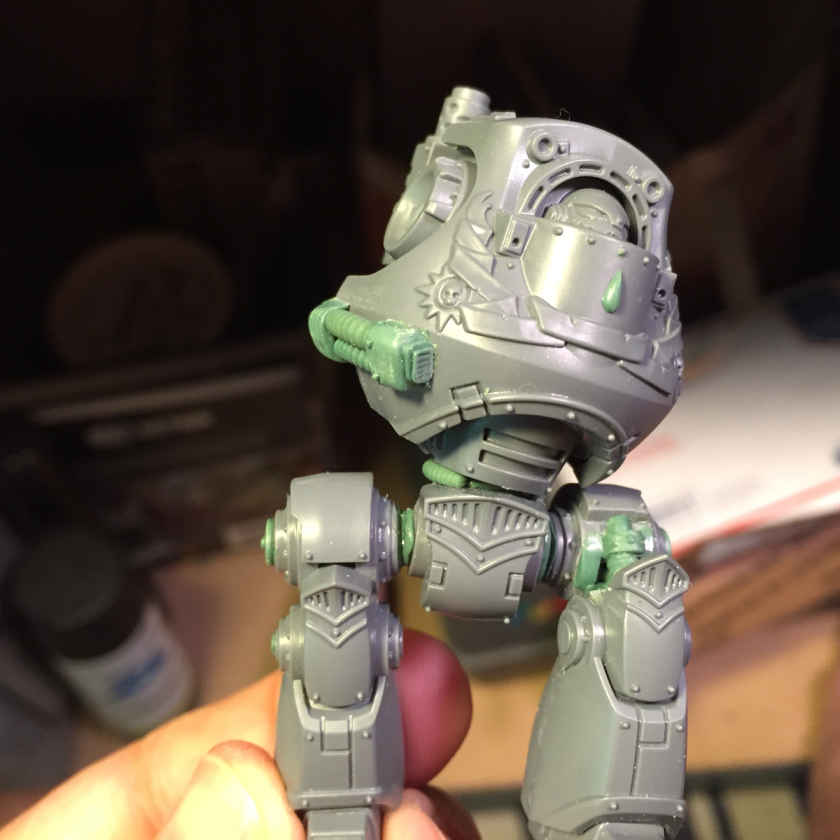
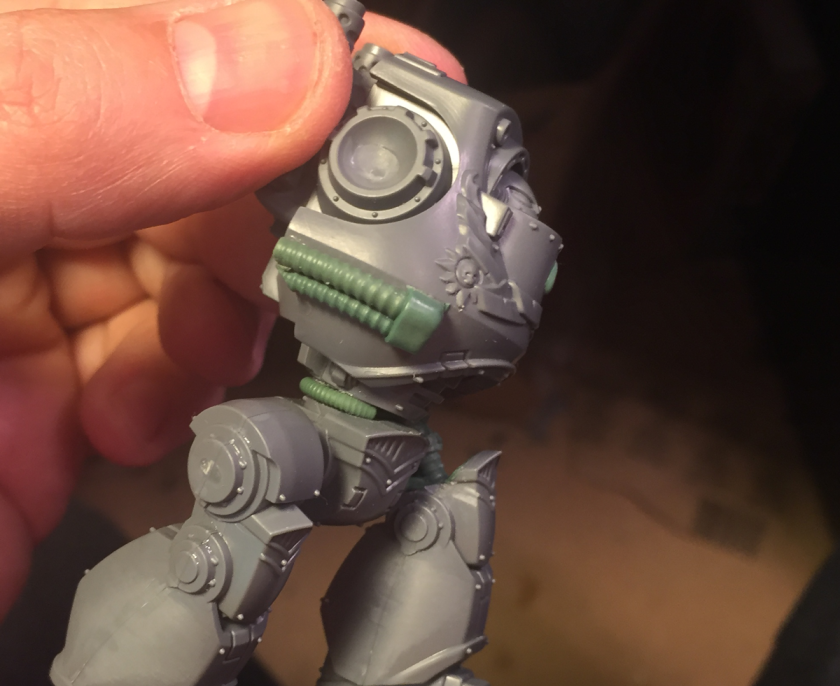
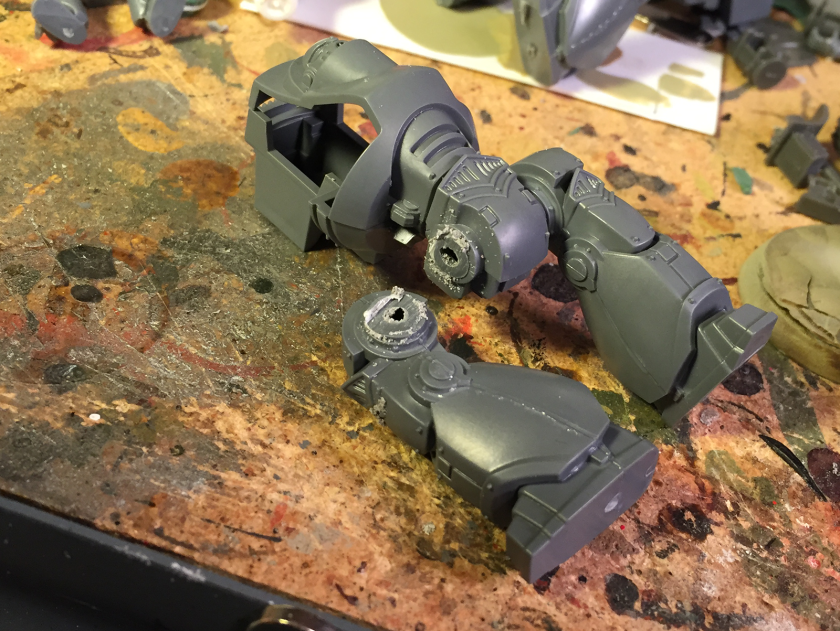
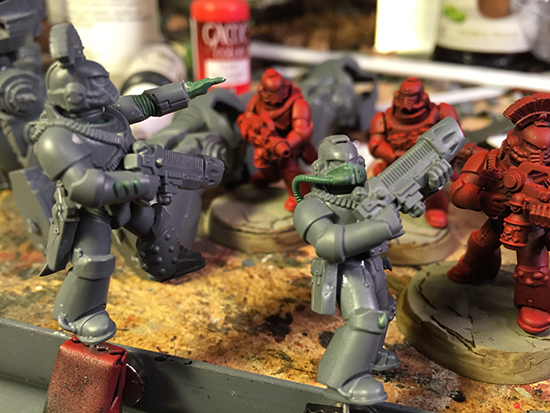
I’ve been working on my 30k Blood Angels for an upcoming event. Here are some Work in Progress shots.
I’ve been cranking on terrain and my 30k Blood Angels for a Horus Heresy event that we are running this summer. Part of this project was referenced in my prior posts about modifying the BaC Contemptor Dreadnought.
Originally my goal was to do an Orbital Strike drop-pod list, I still want to run that occasionally but I have decided to change directions slightly and do a ‘Day of Revelation’ Assault Marine list instead. It’s a more compact project which still involves several drop pods.
Here are some work in progress shots of the units I’ve been working on.
Leviathan – I recently plucked the heavy Flamers off of the model and replaced them with Iliastus Assault Cannons. You can see some landspeeder press mold bits in the foreground.
One of several jetbikes – I have about 9 of these, several will be dedicated to characters.
Landspeeder Squadron – 5 speeder squadron is underway. The graviton gun on the top is controlled remotely by the gunner in the right hand seat.
Jetbike Chaplain – This is one of the characters who will be riding around, causing trouble, in my jetbike squad.
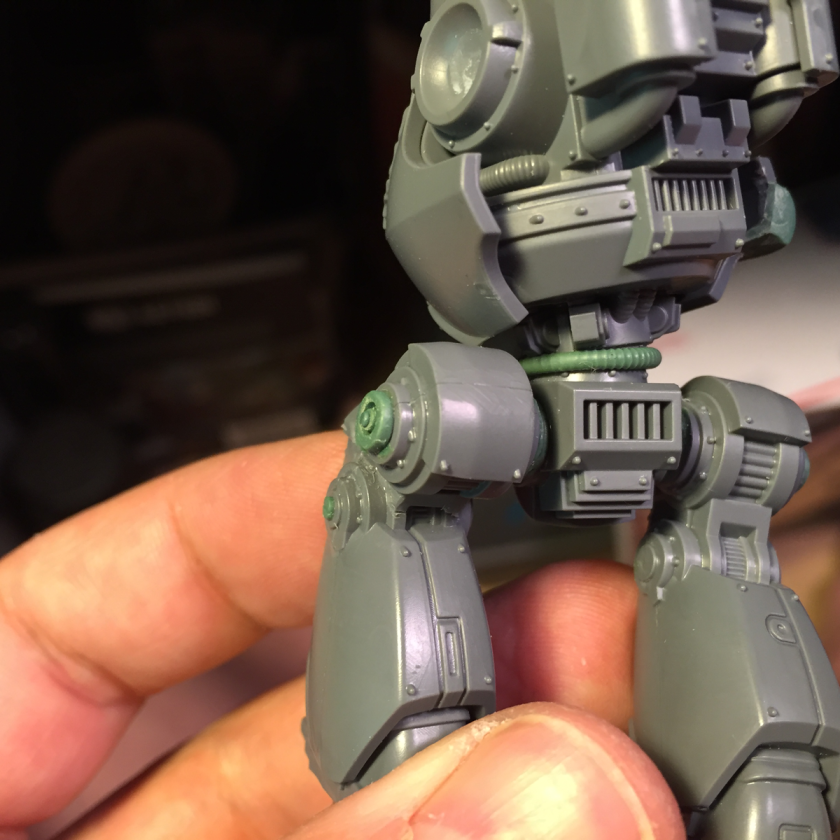
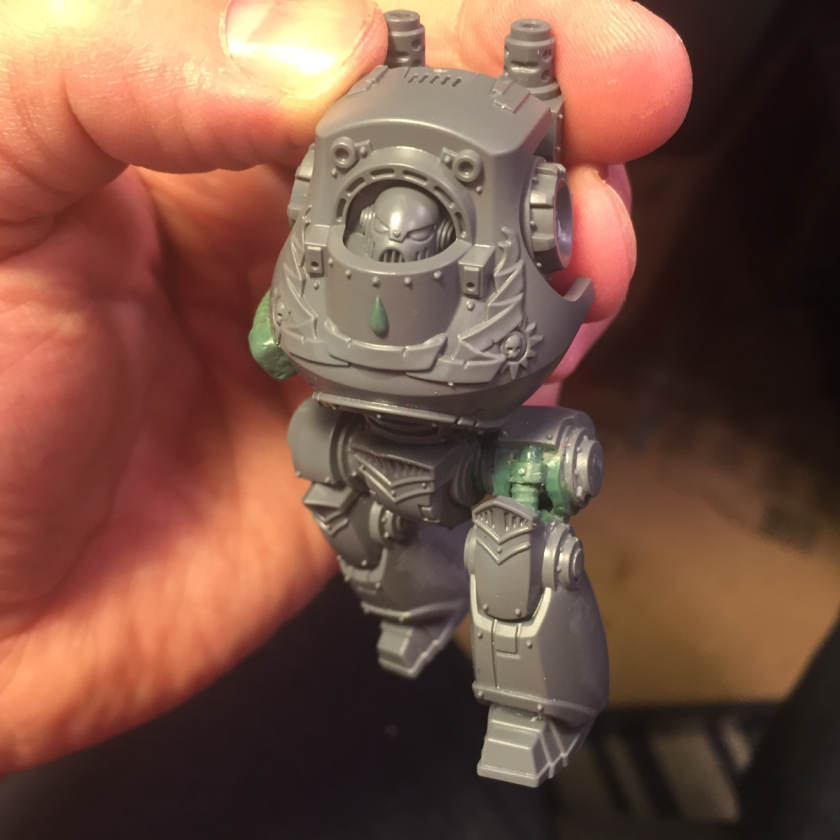
Contemptor Dreadnought with 2x powerfists & plas-blasters
Contemptor Dreadnought with 2x Kheres Assault Cannon
Most of this fits into my new list.everything has a pile of work to do yet, but I wanted to share some of the work in progress. Once I get my assault marines all buttoned up they will join these units on the paint bench.
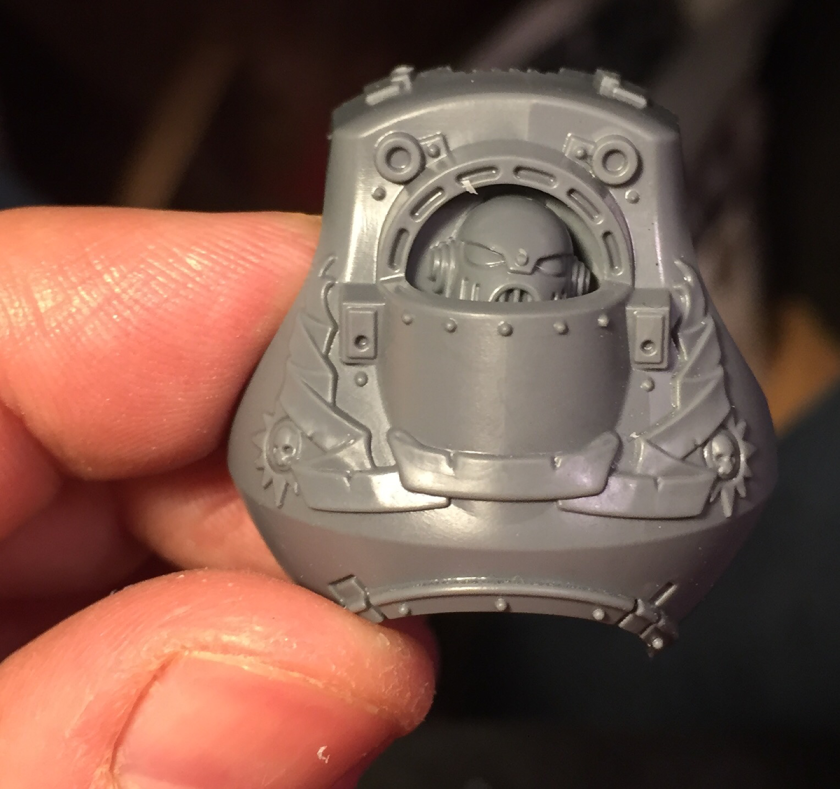
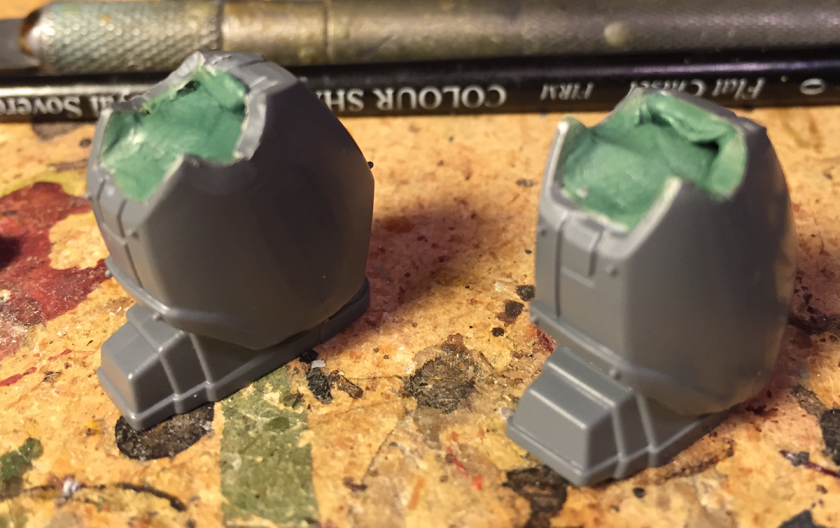
This dreadnought is nearing a point where I can start priming him. I’ve positioned the legs, added the final layers of detail (a few bits missing yet), and have completed his two plasma-blaster dread CCW arms.
The body received a bit of extra detail here and there. My goal is to have each of my dreadnoughts be fairly unique with little details that help define their individual character and some of their story. This one has some field repairs done on the outside of his carapace, a rerouted supplemental power feed or something.
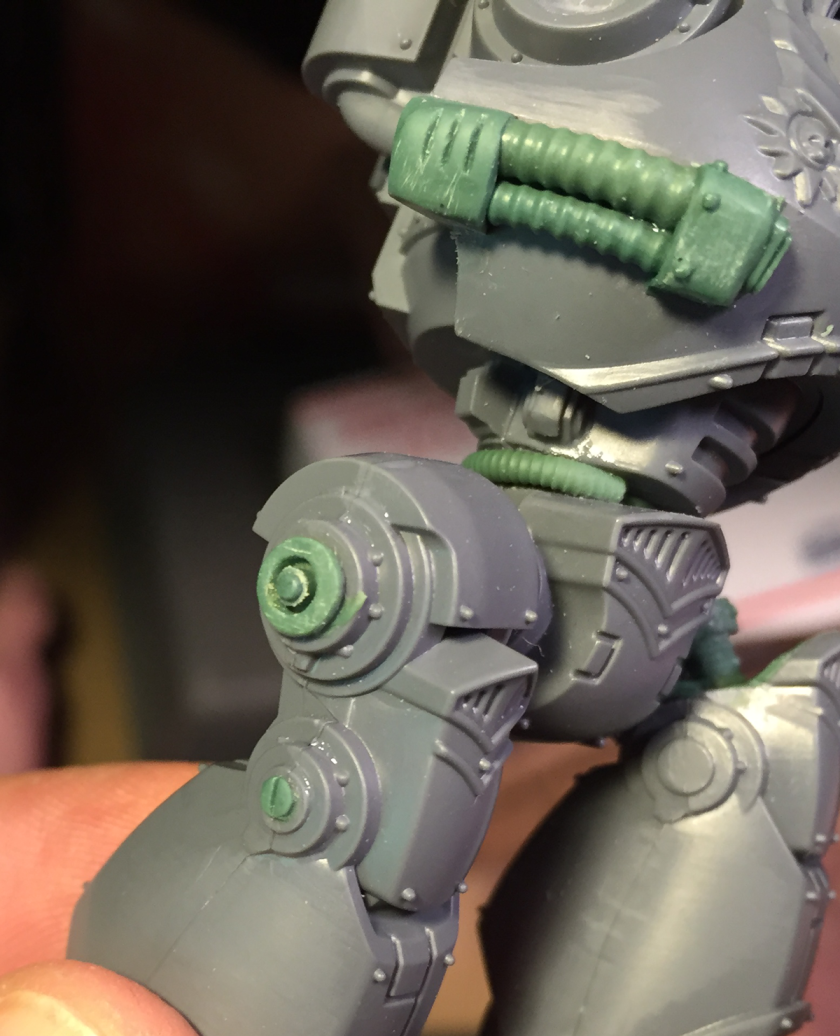
Detailing and leg pose on the dread’s torso.Some additional detail added to his hip and to the waist to help cover the mounting points.I was inspired by the level of detail on the Forgeworld resin dreadnoughts. Get back to work Mike.
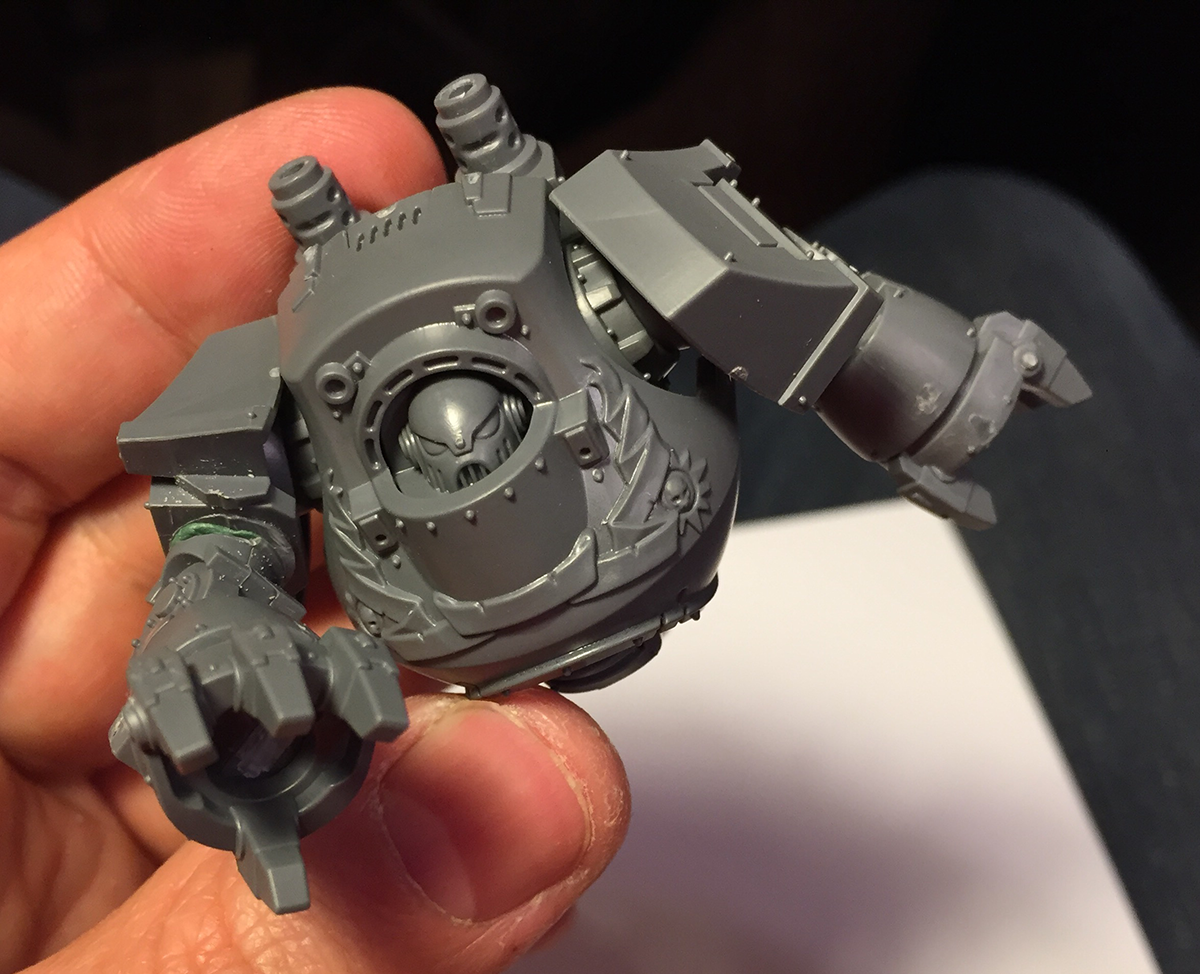
The arms of this dreadnought were an area where I wanted to hide some additional details. The idea here is that there are power feeds to his massive, weaponized arms. I like these being tucked under the arms a bit so that they are immediately noticeable. I like the idea that these details are there for someone who really studies the model.
Arm cables for the plasma weapons
Plasma blaster made from a 40k era plasmagun hidden in fist.
Once I get the parts completed and primed I am going to bust out the airbrush and some red paint! I’ll finish assembly once the basecoat and much of the detailing is complete.
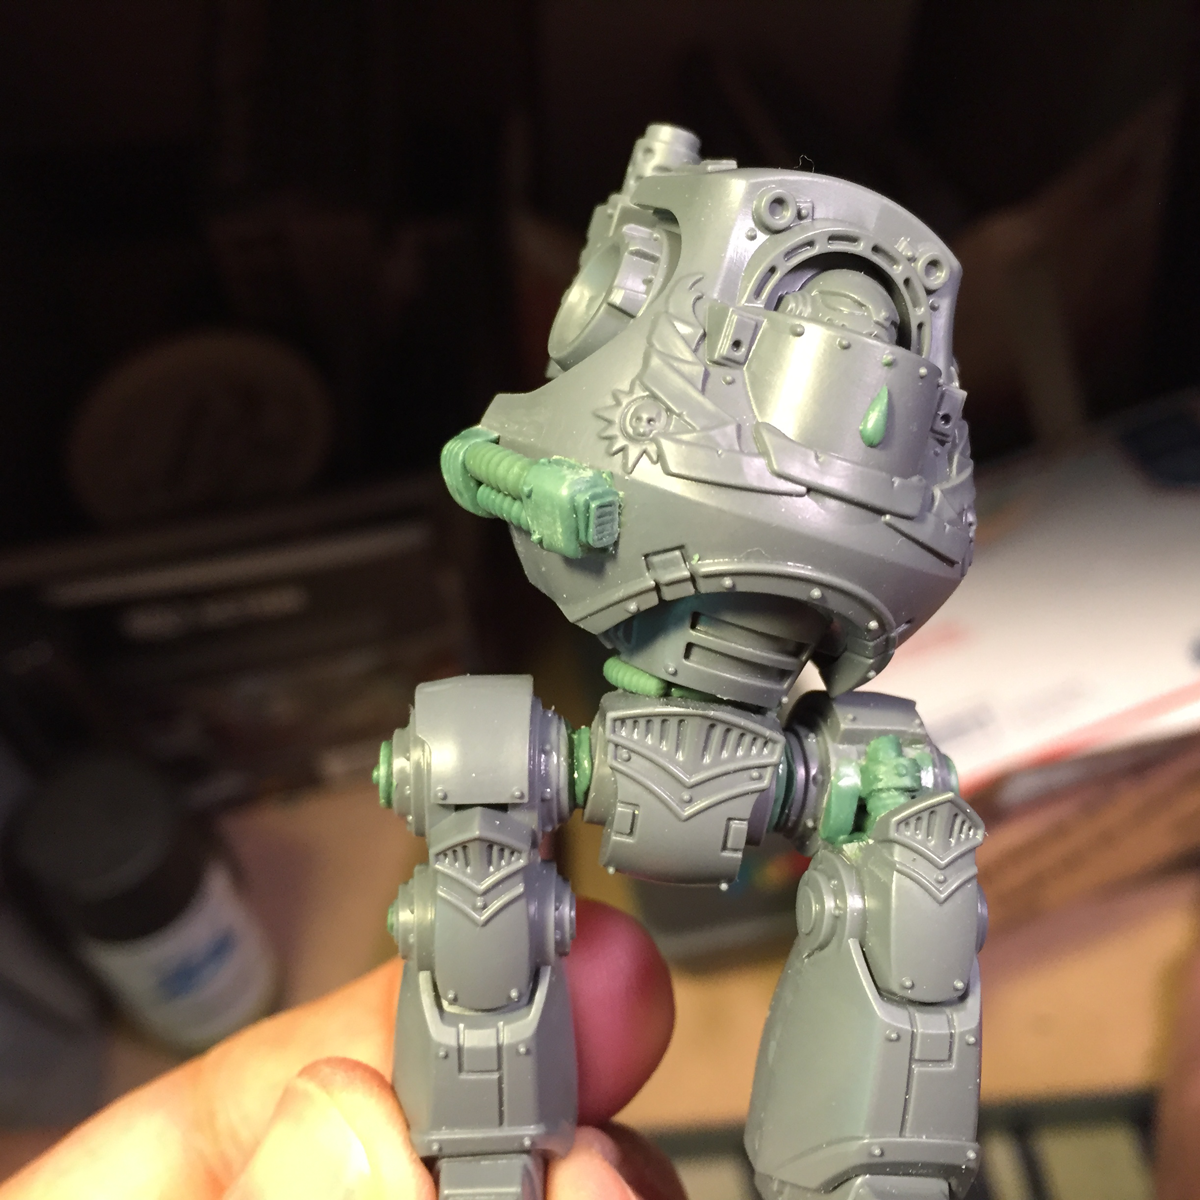
Part 2 of a multipart series of posts on converting the Betrayal At Calth dreadnought.
The most time consuming and difficult part of this project so far has been the legs of the dreadnought. I think I will be working to find ways around doing this much resculpting for the other models. I like how this is turning out, I just don’t want to go through an involved sculpting process for each one.
I’ve switched to a procedure for converting which requires less sculpting and which uses more of the components that are part of the original model.
Repositioned Knee after a bit of careful cutting and gluing.A bit of hose made with a tentacle maker was used to add some detail to the exposed leg area.
The leg can be repositioned pretty easily once you detach the upper and lower legs. The cutting can be a bit rough if you aren’t careful, but this can be easily cleaned up later. Here I put some additional detail on the inner leg which helped fill the void created by cutting the leg up.
The gap was filled in and some detailing added.
I rebuilt part of the hip joint and created some more interesting detail on the front part of the leg. This still needs some clean up, but is looking pretty good.
Extra details added to the hull of the dreadnought
I’ve started to add some additional details to the dreadnought’s armor. These pipes may have been part of a field modification or repair. My intention is to convert the dreadnoughts to give each one of them a unique character.
Legs attached and posed.
The dreadnought is starting to come together. A bit more detailing work and it’ll be ready to be primed! Next up I will share some of that as well as the finished conversion work on it’s arms.
Part one of a short series showing the Contemptor Dreadnought from Betrayal at Calth being converted.
I’ve been collecting several of the of the Betrayal at Calth dreadnoughts to add to my Blood Angels force. The models in this set are fantastic, but the dreadnought’s pose is a little flat. I am going to reposition them to varying degrees, primarily the legs the head and the torso. This opens up a lot of dynamic options for the model.
Stock pose for the dreadnought
Removed legs after a saw cut at the hip
The first dreadnought is going to receive some significant leg work. Others will likely have more simple repositioning. This one is going to have a remodeled middle leg.
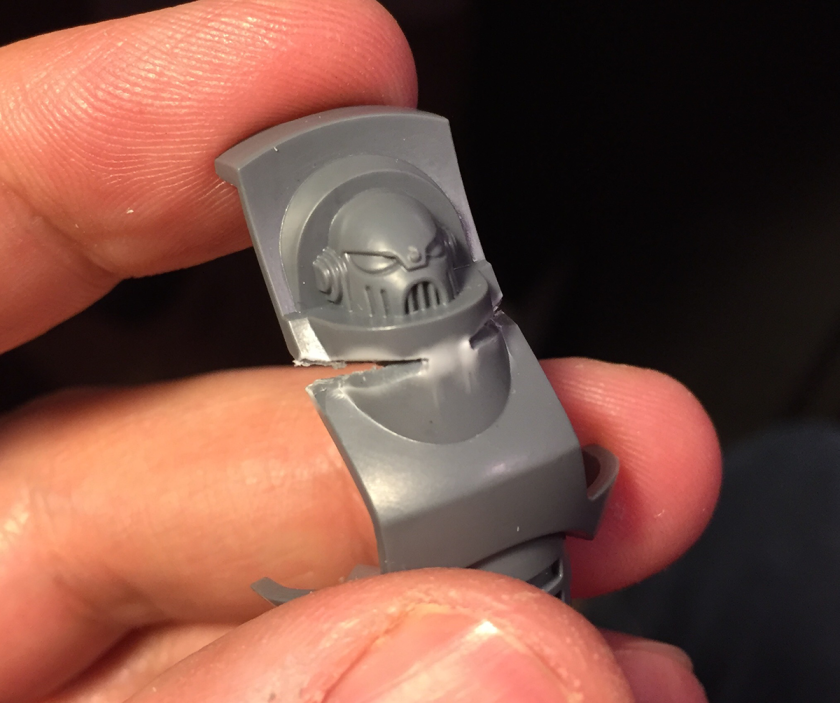
Cutting out the Dreadnought head for repositioning
Changing the position of the head on this kit is pretty easy. Once its been removed from the liner part of the torso and trimmed it can be pivoted slightly to bring a lot out of the torso’s upper body.
Removed and trimmed head
Repositioned head
Even a little bit of repositioning of the dreadnought’s head will make the torso’s position a lot more interesting.
Dreadnought legs cut, knees separated
Next up its time to chop up the legs. I am discarding the knee and middle leg. The plan is to rebuild these out of plasticard and putty.
Lower legs filled in
Using some greenstuff putty the cavity inside the trimmed lower legs are filled in. This will provide a solid foundation for the rest of the legs to built on.
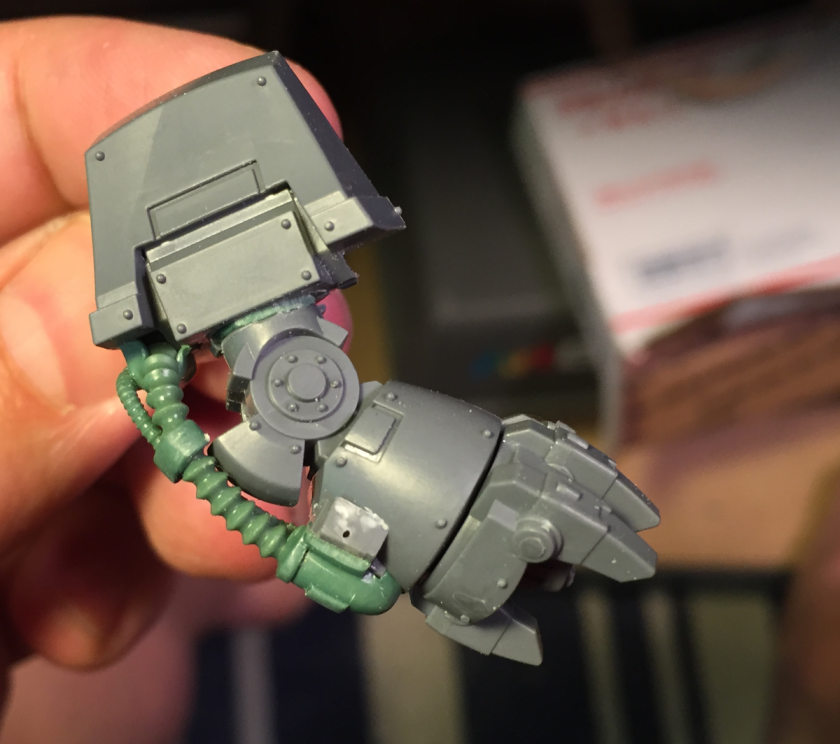
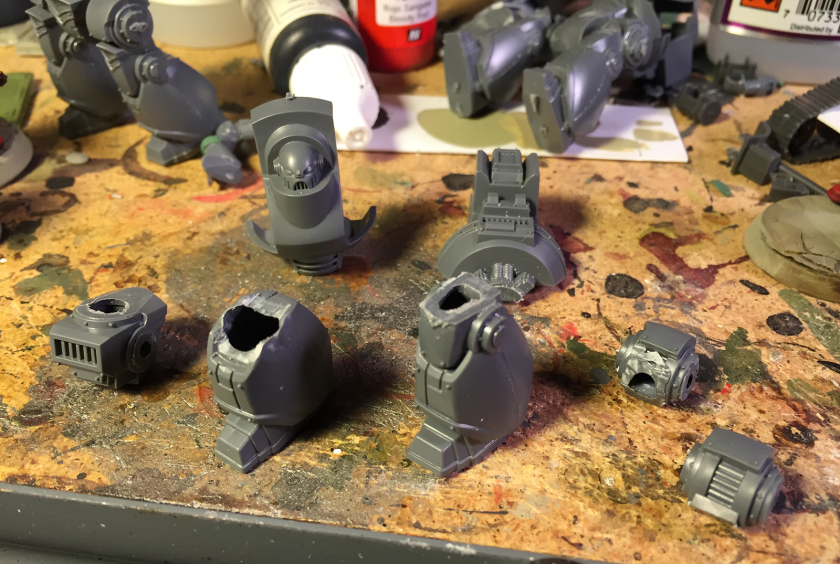
Dreadnought Close Combat Arms
The contemptor dreadnought’s arms are convenient in that they are symmetrical making it very easy to create a left and right arm from the close combat weapon arm from 2 separate kits. Other dreadnoughts will have different load-outs that I can assemble later.
Test assembly of dreadnought upper body
Using a small amount of glue I did a test pose for the upper torso. This begins to capture the aggressive pose that I am going for with this model.
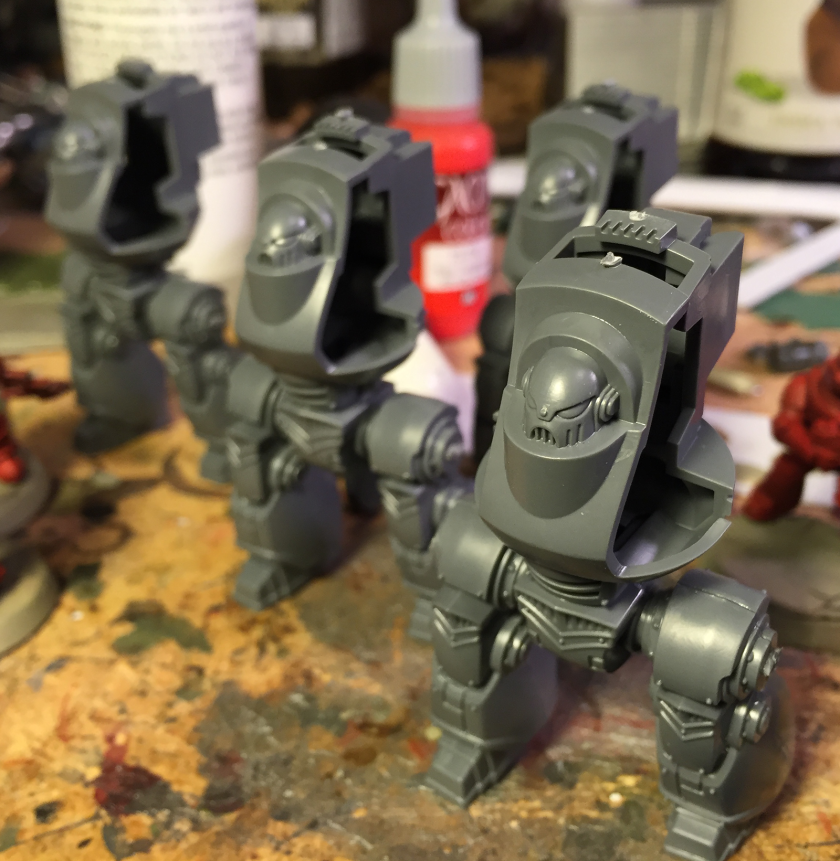
I’ve been bitten by the 30k bug since the release of the Betrayal at Calth box set. I’ve wanted to do a Horus Heresy army for years but found the FW prices & shipping to be a barrier to entry. The models provided in the set are excellent and are perfect for a conversion junky such as myself. GW did a nice job of keeping the models simple and well designed. They mesh perfectly with the FW resins as well as the GW 40k marines and have a refreshing lack of random adornment (Purity Seals… blech).
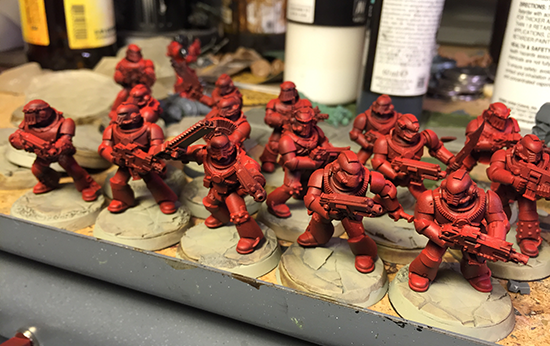
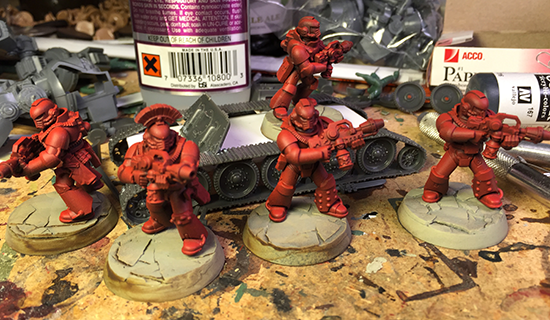
15 Man Tactical Squad 5 Flamer Tactical Support MarinesMy first group of Astartes for this project is a 15 man block of Tactical marines in a mix of Mk 3 and Mk 4 armor, a similar 10 man block, and Plasma-gun and flamer wielding Tactical Support squads.
2 Plasma Support Marines. I need to finish up the commander’s pointing hand. Close up of a Tac Support Marine. You can see my basing plan with this shot.After I complete these guys I am going to hack up the Contemptor Dreadnought for some re-posing! Stay tuned.
With another Operation Sting in the bag, I’m finding myself very motivated to work on minis for that system. The Soviet Scout army is coming along well and there are more Russians on the way in the form of a Tankovy company (more on that soon). In addition to the Soviets, I’m getting into an Australian 9th Division army project.
I’m basing this project around the Perry Brothers plastic Desert Rats kit. These minis are the first plastics from the Perrys that I’ve worked with and so far it seems to be a cool kit!
This is a very detailed kit which may be a bit of a challenge for those intimidated by those who aren’t very much into the modelling aspects of this hobby. This feels like a scale model kit more than wargamining miniatures due to the vast amount of parts which come on each sprue.
Luckily I’m into this sort of thing. I did lots of models groing up befor getti g into gaming and I appreciate the Perrys for their attention to detail and craft with this kit. Loads of options in terms of gear and even some alternative heads for making LRDG or SAS figures. This headswap requires some cutting, but it shouldnt be much of a challenge for most hobbyists.
Shown above is my sprue processing system in action… not much of a system; clip thing, find where it rocketed to the floor, put in tub to be cleaned later. One interesting bit to these minis is their independant helmets & hats. That is something of a unique attribute to these minis, and one which works for me as I’m intending to slap some Aussie brimmed hats on some of these guys.
Getting these guys prepped is the bext step then its back to doing some final paintin on the Soviets as well as some sculpting. I’ll share some more pics over the weekend!
October has a lot going for it. The weather changes, apples happen, halloween, my birthday, and since last year a fantastic Bolt Action event called Operation Sting occurs! October has always been my favorite month, and this tournament simply piles more good on the good.
Have you heard the good news?
Operation Sting was truly fantastic this year. I did much better, had more fun, and really came to find an iteration of the Soviet Army which I very much enjoy playing. I’d like to share some pictures of the event as well as some stories and insights about my latest Soviet build.
The army which accompanied me to Operation Sting is based on the lead recon elements during the summer 44 offensives of Operation Bagration on the Eastern Front. The list is taken from the bog-standard Soviet selector from Armies of the Soviet Union and is built around a core of 3 Scout units, small panzerfaust tank hunting teams, and some Rota-Razvedki cruising around in their lend-lease White Scout car. This is the first Soviet Build I’ve taken to the field which didn’t include a tank, and I didn’t miss it a lot. I love tank duels in Bolt Action, but it really doesn’t fit the elite, raiding vibe of the list. That being said I did have some fairly conventional Red Army units in the list to bolster the veteran units. Here is a brief summary of what I took to the event…
Vet Junior Lt with a SMG friend
3 Scout units, 7 strong with SMGs
3 AT teams with SMGs and a single Panzerfaust
Artillery Forward Observer
Sniper
Tank Riders (representing Razvedki)
White Scout Car, Recce enabled
Inexperienced Rifle Squad
45mm M-42 AT gun
The list was fun to play. I discovered that using a smoke bombardment to cover the advance of the scouts was pretty effective. The schtick of this army is that 8 of the 13 units can use forward deployment. This wasn’t some kind of overly leveraged special rule in my experience, but it did allow me to dictate where the fighting was going to happen and to have units ready to rock early in the game as opposed to being in reserve. I think that this could be a very powerful advantage once I learn how to use it. In several of my games I faced close-quarter badasses which outclassed my small vet units, SMGs or not. Ghurkas, large, tough fighting Senegalese units, and Armored Soviet Tank riders were tough to cope with and demanded more finesse to engage.
In the end I was pleased with my performance winning 2 games, drawing a game, and losing 2 – each one of these games was very fun, against great guys, and had their own challenges.
Some shots from the event…
Inexperienced infantry advance across the sub pen to cover the flak of the attacking scout units.Game 4. Scouts advance through a smoke cloud (ring of white dice) to capture an objective covered by several SS Machine guns and units! Bloody and very historically accurate feeling game!BT7 TankJohn Stentz’ objective for his British army which I faced round 1.Commissar from an inspirational Soviet armyJeremy Williams fantastic desert airfield board! I played on this several times now and its always fun! A good mix of open space and cover.John Stentz’ British army. The two Ghurka units were a pain and a distraction while his arty and flame thrower managed to pin and punish my units. Great game and I want a rematch!!!This is the John Humphrey’s table that I helped a bit with and have played about half my Bolt Action games on!“It is my submarine” The scouts supported by a tank-hunter team capture the sub which gave me some bonus points thanks to Operation Sting’s hidden bonus objective format.(I think) Jeremy Olsen’s Italian Paratroopers. I was stoked that he made it to the event! Visit his site… http://empireofghosts.blogspot.com/Charlie’s British army which I faced in game 5. Winning game 5 provided me some revenge after Charlie stomping me at Operation Sting last year!Soviet scouts ready to move to the objective to locate the intel… across the road is a line of Waffen SS just waiting to pour fire into my brave soldiers!Scout unit advances to objectives in the sub penJohn Stentz’ battle-smile.Soviet sniper covering the road to keep the Germans honest. This was a bad play as they stayed shut up in their buildings when I should have been putting pins on them and robbing them of Assault Rifle troops. Live and learn.Shot of the excellent and very fun Sub pen board. I would like to get more games in on this.Check out this amazing Objective marker! This Soviet army is one of my very favorites and has set the bar with what I hope to achieve with my own army eventually.
The TO approached me about making a show figure for Operation Sting as well. I was very excited to have this opportunity to get Horrorshow Miniatures involved in such a cool event! We decided to do something of a multi purpose Forward Observer character that people could easily use in their armies. I took some creative liberties with the character’s gear to keep him from being too clearly from a certain nation. A set of independent heads gives the modeler some options in this regard. This guy was very fun to sculpt and I really hope to see some of these models which were provided to the Operation Sting attendees painted and on the boards at Adepticon next year!!
Forward Observer Green ComponantsBritish FOGerman FO
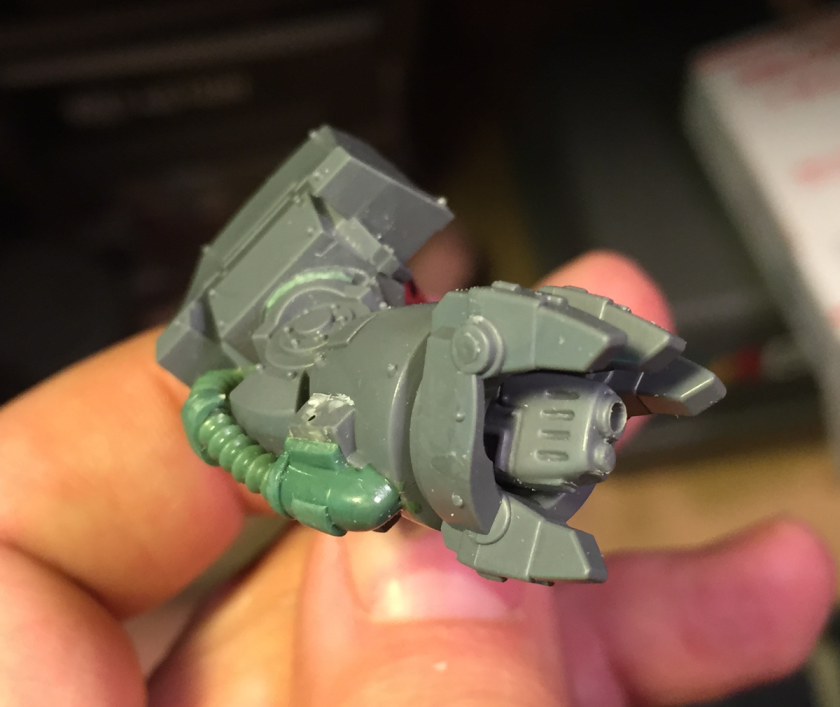
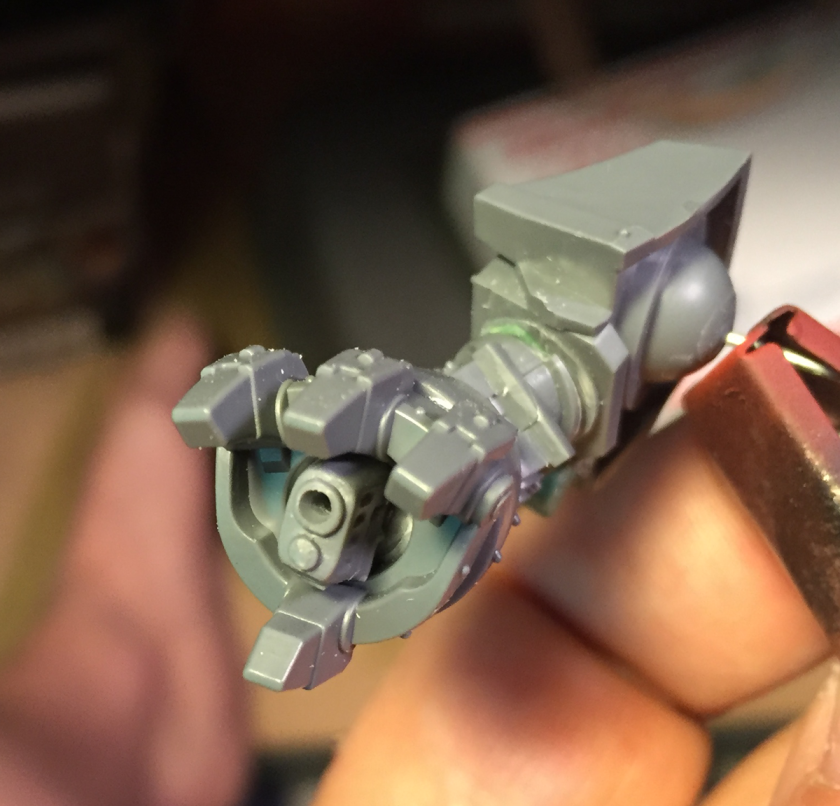
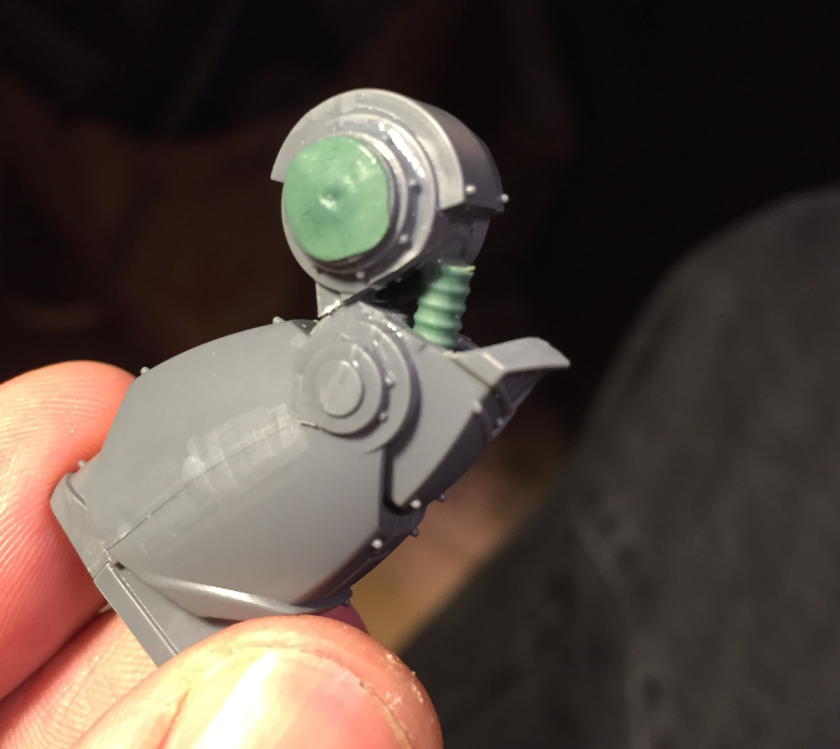
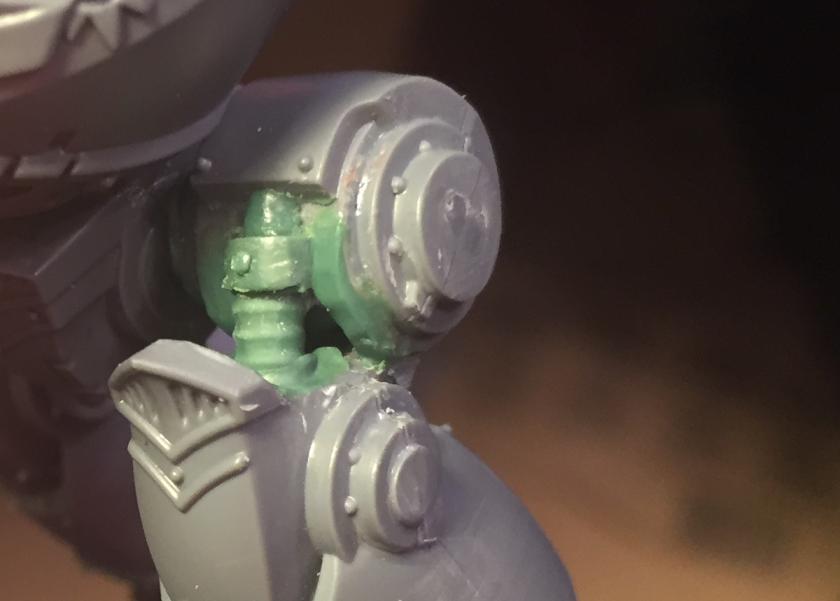
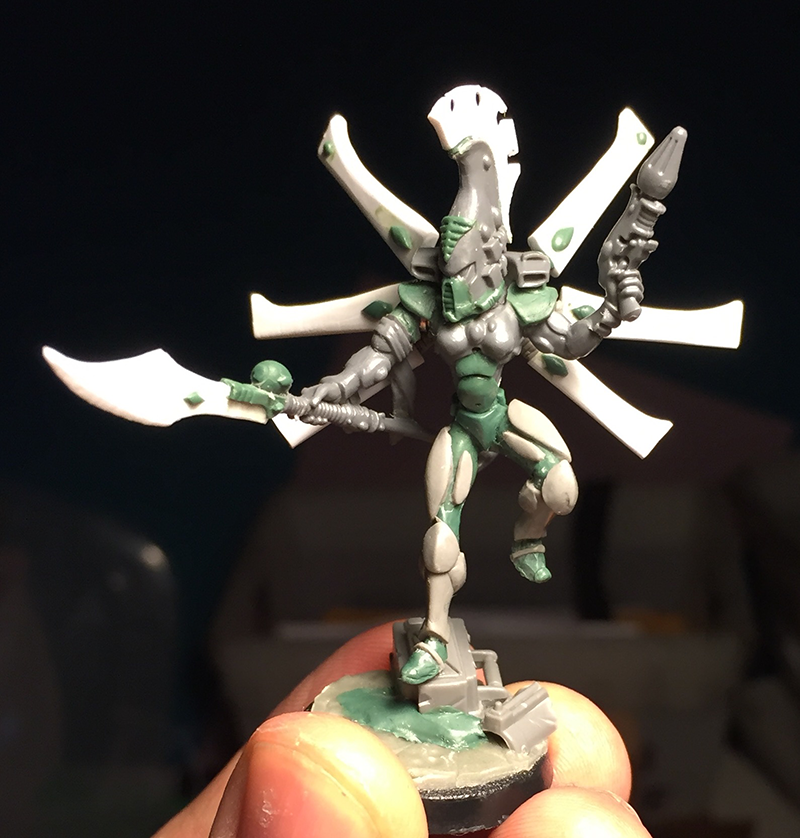
I’ve been working on a new model for my Eldar collection. Eldar Autarch!
She’s kitted out with a Banshee mask, power weapon (maybe Shard of Anaris), Fusion pistol, Hawk wings, and Faolchu’s wing. She has extreme mobility and can perform a couple different jobs on the field.
Her natural Autarch ability of governing reserves is handy for the Falcon Cloudstrike, but what she really adds to the army is mobile support for other units. She can combo charge with another unit to shut down overwatch. Her fusion pistol makes her a threat against armor and ICs. She could work as a hunter in the opponent’s backfield as well stalking weaker support units and chaff. She can practically get anywhere on the table in a turn or two with either her epic run move or deep-strike from ongoing reserves. Her threat range is massive thanks to the Swooping Hawk Jump Pack.
She is a bit fragile, so that movement may be something used defensively as much as anything else.
Next step is to finish up the sculpting. There are some rough areas on her legs which need to be cleaned up and some details which need to be refined. After that painting time.
Her CCW arm is magnetized so I can swap it with something else. I am not certain that I am comfortable with her using a power halberd or some-such, so I may make a sword arm as well. The Shard of Anaris is fantastic for character hunting so I think that is something worth considering for her. Its a pricey bit of wargear, so it may only appear in certain games.
I’m looking forward to getting this character onto the board.
The Kickstarter for ‘Broken Contract’ is in its last two days. I was lucky enough to play test the game a little and get an opportunity to see behind the scenes of the miniature and component design. Its a fun game which has a very unique setting and style for the miniatures table top gaming scene. Here are some shots of some of the minis as well as a sense of what the setting is like…
Its a post apocalyptic skirmish game set in a bleak future where human colonies have been established, but often at the cost of the masses bound to a life of indentured servitude. I am excited to see where this game goes. Check it out!